|
How
to Add Custom Item ?
Custom Item allows you to erase
file(s), folder or registry entry(s) that you want to erase. If you
have files, folders or registry entry(s) need to be erased
periodically , it is a good way to add a Custom Item to erase them.
With the Securely Erasing enable, you can erase the files
completely, others can not recover or undelete
them.
To add a Custom Item, click the Eraser
Setting->Custom Items->Add, there are 2
typies of Custom Item: Registry Item and File & Folder
Item.
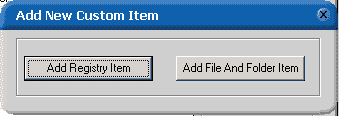
1) Add Registry Item
Click Add Registry Item
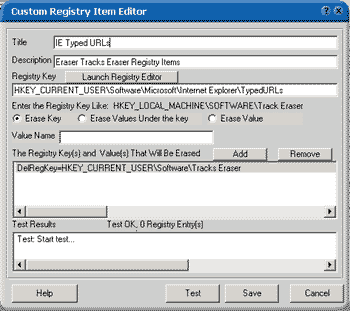
- Title The
name of the Custom Item,( e.g. Myitem)
- Description Description
of this Custom Item
- Registry Key The
Registry Items that will be erased
- Launch Registry Editor
Use the system's Registry Editor to select the registry
key to be erased, once you use the Registry Editor's Copy Key
Name to copy the key or just press Ctrl+C to copy the
key name, the key will automatically appear on the Registry
Key text box.
- Erase Key Erase
the key you selected above
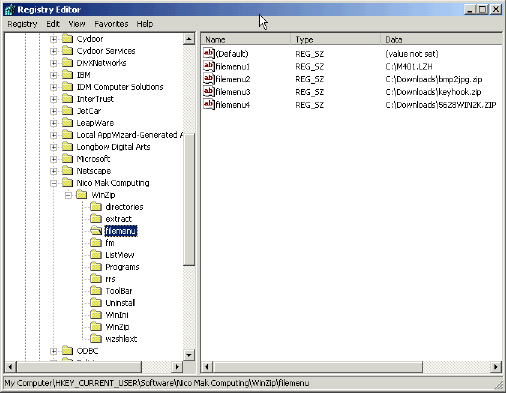
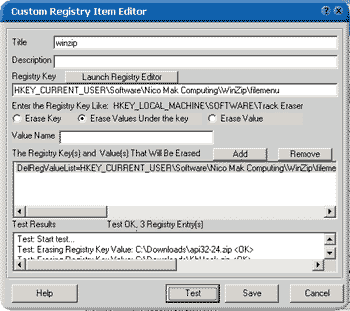
- Erase Value Under the key
Erase the Value under the
selected key , Below is an example (Winzip Recent Files)
- Erase Value Erase
the key value you fill in the ValueName text box under the
selected key
2)Add File And Folder Item
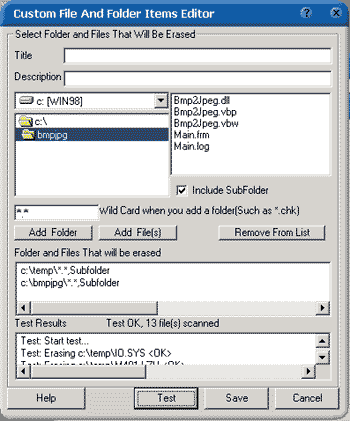
- Title
The name of the Custom Item, (e.g. Mytest)
- Description Description
of this Custom Item (e.g. erase my registry items)
- Add Folder Add
the folder to the list that will be erased,
- Include SubFolder
Check this will include the
subfolder under the selected folder
- Add Files Add
file(s) to the list that will be erased, you can erase the files
using wild card, default is "*.*". (for example,
you want to erase mp3 files under c:\temp
folder, just fill in the wild card text box with
"*.mp3"
- Remove From List
Remove the selected item
- Test Results Show
the test results
- Test click
this will test the items selected
- Save Save
the item
[
Home ]
[ Download Now ] [ Order
Now ] [ FAQ ] [ Plugins
] [ Contact Us ] [ links
]
|